
Monday, May 27, 2013
Link to free tutorial for a Modern Nursing Shawl
Hi everyone,
I recently came across a free tutorial for a Modern Nursing Shawl (see link below) which looks really easy to make. Depending on fabric you use, the shawl looks light, comfy and easy to use. Wished I had these when I was nursing my babies. I have no pics at the moment but I plan to make some for some expecting mothers :).
http://www.thecoterieblog.com/2012/05/dyi-modern-nursing-shawl-sew-one-line.html
Thanks for stopping by :).
Jenn
Wednesday, January 2, 2013
New Family Activity - Geocaching
Hello :),
Long time no blog :). Recently a friend shared an activity they discovered. We thought to try it out and now the whole family is hooked :). The activity is GeoCaching :).
How it works? You pick a cache to go find on www.geocaching.com. Use a GPS (or your mobile if it has a GPS) to go find it. There is usually a hint or two available to help you find it :). It can be a micro cache (tiny) to a regular sized cache. Each cache will have a log book and regular sized cache often have trinkets in them. Sometimes you find a trackable (e.g. Travel Bug Tag). Trackables have an ID code which you enter on the website that you've found it. You will be able to see where it originated and where it has travelled before coming to the location you found it in :). You then put it in another cache for someone else to find.
Geocaching is great in getting the kids (& adults) out of the house, is a fun way to exercise, is like treasure hunting for the kids (trinkets to be found & swapped) and is FREE!
Here's my 3yo DD's doll at the first cache I found :).

My family found a trackable (Travel Bug Tag). DH logged it and we discovered that it originated in Canada :). It travelled around Canada before making it's way to US, Germany, Czech, Singapore then Queensland Australia where we found it :). We are now trying to find a great place to leave it for someone else to find it :).
Cheers,
Jenn
Saturday, November 26, 2011
Fish & Teddy Bear Recycle Crayons
I've been meaning to try make Recycle Crayons since a friend did some crayon hearts in Feb for her daughter to give to her classmates :). With 2 weeks of school left before Summer Vacation, I thought these would make cute Xmas gifts for my kids' classmates :). More fun than Candy Cane :).
There is already lots of tuts on the Internet on how to do this so I won't go into too much details. However I should add that I set my oven at 200 degrees C :). I also had them in the oven until all the crayons melted (10-15 mins). Should be quick but I had some stubborn ones that took a while. I allowed them to cool on the bench then put them in the freezer for about 5-10 mins. They then popped out really easily :).
Here is the full set of crayons I did today with my whole stash of old crayons.

Here is the close up of the Fish Crayon

Here is the close up of the Teddy Bear Crayon :).

Thanks for stopping by :).
Jenn.
Monday, July 18, 2011
Home Made Yoghurt for the Kids
About a year ago, my friend Kathleen suggested we try/use EasiYo to make our own Yoghurt. We were really keen to try and finally bought one :). Lol yes it has taken us a year to get one :P. We're really amazed how easy it was :). Here's a quick run down of the steps :).


Cheers,
Jenn
You need the EasiYo containers :). Note: we took the lid off the big container for this pic :).

And a yoghurt powder mix. This is the yoghurt we're going to make for the kids to try :).

Step 1: We half filled the smaller container with cool water & poured in the yoghurt mix powder :). We stirred it until it was mixed.

Step 2: We filled the container to the top with cool water. Put the lid back on and gave it a good shake :).

Step 3: We poured hot water into the bigger container to the top of the internal baffle (coloured red - see first pic). Then placed the smaller container inside :). And put the lid back on :).

Step 4: We left it overnight (8-12 hours) on our kitchen bench until it was set :). Here's a pic before we placed it in the fridge (next morning).

Step 5: Enjoy! Yoghurt & strawberries for dessert :). DS preferred it with a little caramel sauce swirled in :).

Cheers,
Jenn
Wednesday, July 6, 2011
A Day at Roma Street Parkland
One of our school holiday activities was to take the older two kids into the city & Roma Street Parkland for the School Holiday Fun (first week of school holidays). There were face painting, balloon animals, jumping castle and baby animals to pet :). We all had a great day :).
As for me, I couldn't resist taking some photos with my trusty Point & Shoot :).
Here's a pic of the kids & DH walking around Roma Street Parkland :). Sorry for the bad pic. I was playing with manual mode in the shade so it was way too bright when we suddenly went out in the sun.

Here's a pic of the fountain :). I took several but this was the best one :P.

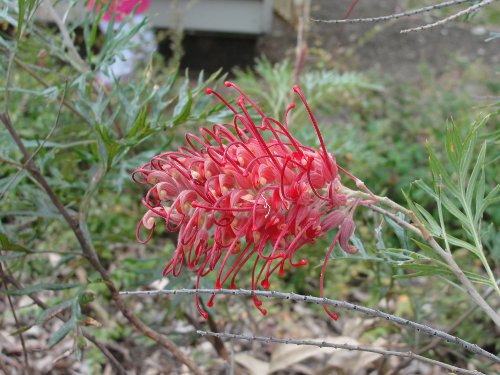
And of course I couldn't resist taking pics of some flowers :).


BTW for more information about Roma Street Parkland, visit www.romastreetparkland.com/Pages/default.aspx.
As for me, I couldn't resist taking some photos with my trusty Point & Shoot :).
Here's a pic of the kids & DH walking around Roma Street Parkland :). Sorry for the bad pic. I was playing with manual mode in the shade so it was way too bright when we suddenly went out in the sun.


Monday, June 27, 2011
A visit by the Black Swan :)
The other day we took the girls to feed some ducks at the local dam and were surprised to see a black swan. Forgot my camera so we went back today and the black swan again came by for some food :). Remembered my camera this time so here are a few pics of the black swan :D.
The gorgeous black swan :).

A pic at the bank to see how close the black swan was to us :). The black swan was rather cranky at the ducks. This pic was taken just before the black swan snapped & scattered all the ducks.

Another pic of the black swan with a couple of ducks :).

My 4yo DD watching & saying goodbye to the ducks & swan :).

I could never resist pics of flowers so here are a few I took at the local dam :).


Thanks for stopping by to look at my pics :). Have a great day :).
Jenn.


Thanks for stopping by to look at my pics :). Have a great day :).
Jenn.
Monday, June 20, 2011
They're here! My kids' Buttfreckles are here :).
I discovered Buttfreckles not that long ago and knew I had to get some for my kids :). These are handmade by a lovely lady named Bridgette in Austin Texas USA.

Clockwise from top: 9yo DS's Buttfreckles in Brisbane Broncos colours, 4yo DD's Panicked Princess Buttfreckle & 2yo DD's Berries & Cream Buttfreckle :).
You can purchase these gorgeous Buttfreckles on B's website: www.buttfreckle.com. She has one upload a week and are always sold out real quick! She also makes CUTE OOAK Buttfreckles :). To follow her on Facebook her FB Buttfreckle page.
Think I need more for Christmas Stocking :).
Jenn XOXO
My kids' Buttfreckles :)
Clockwise from top: 9yo DS's Buttfreckles in Brisbane Broncos colours, 4yo DD's Panicked Princess Buttfreckle & 2yo DD's Berries & Cream Buttfreckle :).
You can purchase these gorgeous Buttfreckles on B's website: www.buttfreckle.com. She has one upload a week and are always sold out real quick! She also makes CUTE OOAK Buttfreckles :). To follow her on Facebook her FB Buttfreckle page.
Think I need more for Christmas Stocking :).
Jenn XOXO
Friday, June 3, 2011
Knitting for Born to Knit
During high school, I used to watch my mother knit or crochet blankets for charities. I've always wanted to contribute but have never found the time to actually finish a blanket. So when Save the Children Australia launched their "Born To knit" Campaign, I decided to challenge myself and actually knit a full blanket ... or maybe 2 :).
Born to Knit is Save the Children's campaign to knit 15,000 blankets to send to children in India, Cambodia & Laos. One knitted blanket will help a child stay warm and feel comfy and safe. Most importantly, this one blanket will help to ward against pneumonia, one of the biggest killers of children under five in the developing world. More info about the Born to Knit campaign can be found here.
The guidelines for knitting a blanket is:
* Use 4mm needles
* Use 8ply 100% pure wool
* A perfect-sized blanket is made up of 16 knitted squares
* Each square should be about 20cms x 20cms
* The final blanket size should be around 80cms x 80cms
Here are my 4mm knitting needles (I've fallen in love with using circular needles) & the 8ply 100% pure wool that I'm going to use :). I went for autumn colours :).

Wish me luck :). Will post my completed blanket & hopefully I have enough time to knit another before the campaign ends :).
Subscribe to:
Posts (Atom)